Take snapshots of current screen
What is this post about
This post rises to explain how to take a snapshot of what LittlevGL is printing in the whole screen. In other words, press a pseudo Ptr Scr key.
I share my way of doing it (with holder functions/variables). I am sure that this way will not fit anyone code at a first glance, but I hope that you catch the drift, so you are able to adapt it for your needs.
Why would I want to take a screen snapshot
This is basically for two main reasons:
-
It helps to analyze what is currently being shown within the screen in a pixel level. For example, opening the image with GIMP could help us to realize that we should move elements on GUI, change colors, modify themes…
-
It is a must if you want to have automatic tests in your program. This could be achieved simply by comparing a reference and new output (it will be explained later).
How to obtain a binary of the whole VDB
The first thing we want to achieve is to flush to a binary file the screen pixel values:
- Global variables used:
static FILE* pFileOut;
static BOOL_E bSnapshot;
- Create a function which will be called whenever we want to take a snapshot:
/** Flush buffer.
 *
 * Flush buffer into a binary file.
 *
 * @note: data pixel should be formated to uint32_t RGBA. Imagemagick requirements.
 *
 * @param[in] pFileName   Output binary file name.
 *
 */
void DISP_IMPL_flushBuffer (const char_t* pFileName)
{
  pFileOut = fopen(pFileName, "w");

  if (pFileOut == NULL) {
    printf(("[Display] error: %s cannot be opened", pFileName));
    return;
  }

  bSnapshot = BOOL_TRUE;
  lv_obj_invalidate(lv_scr_act());
  lv_refr_now();                    /* Will call our disp_drv.disp_flush function */
  bSnapshot = BOOL_FALSE;

  fclose(pFileOut);
  printf(("[Display] data flushed to %s", pFileName));
}
- Write every pixel received form VDB to file:
void APP_DISP_lvgl_flush (const lv_color_t* pData, const DISPLAY_BOUNDS_T* const pPxBounds)
{
  uint32_t data;
  if (bSnapshot == BOOL_TRUE) {
    for (uint32_t i = 0; i < (pPxBounds->dimension.width * pPxBounds->dimension.height); i++) {
      data = DISP_IMPL_lvgl_formatPixel(pData[i]);  /* Function for converting LittlevGL pixel format to RGB888 */
      fwrite(&data,
             sizeof(uint32_t),
             1,
             pFileOut);
    }
  }
}
- Convert pixel to the required format. It is application specific and depends on
LV_COLOR_DEPTHand the desired output format. In this example just a correction is applied on the gray colors.
/** Convert lvgl RGB565 pixel to RGB888 pixel
 *
 * @note: convert potential gray colors to true gray color.
 *
 */
static uint32_t DISP_IMPL_lvgl_formatPixel (lv_color_t color){

  lv_color32_t data = (lv_color32_t) lv_color_to32(color);
  uint8_t aux;

  /* Make potential gray color true gray color */
  if (color.red == color.blue) {
    uint32_t dif = data.green - data.red;
    if (dif <= 8) {
      data.red += dif;
      data.blue += dif;
    }
  }

  /* BGR to RGB */
  aux = data.blue;
  data.blue = data.red;
  data.red = aux;

  return data.full;
}
How to convert binary files to images
Once our screen content has been flushed into a binary file, we lean on Imagemagick to convert every binary file within a directory to an image. This can be basically achieved using next bash commands (you should adapt it to your own requirements):
#!/bin/bash
# convert_bin_images.bash
  OUT_BIN_LIST="${IMAGES_DIR}/*.bin"
  for BIN_FILE in $OUT_BIN_LIST
  do
    convert -size 320X240 -depth 8 rgba:${BIN_FILE} ${BIN_FILE}.bmp
  done
How to compare and differentiate files (automatic tests)
One of the purposes of being able to take snapshots, is to pass automatic test by comparing current output with a reference. In order to achieve it automatically I share the bash basic commands (you should adapt it to your own requirements). Note that if binary files differ a new diff_ image is created in order to show where the difference is:
#!/bin/bash
#run_test.bash

for i in ${BIN_LIST[@]}
do
  diff -q ${IMAGES_DIR_OUT}/$i ${IMAGES_DIR_REF}/$i
  if [ $? != 0 ]; then
    $SCRIPT_DIR/convert_bin_images.bash ${IMAGES_DIR_REF}/$i
    compare ${IMAGES_DIR_OUT}/$i.bmp ${IMAGES_DIR_REF}/$i.bmp -compose src ${IMAGES_DIR_OUT}/diff_$i.png
    TEST_SUITE_OK=0
  fi
done

if [ $TEST_SUITE_OK -eq 0 ]; then
  exit 1
fi
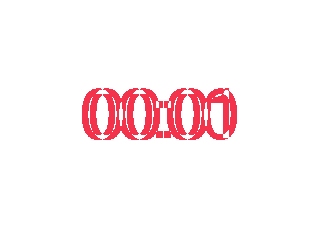
Example snapshots and differences
Output snapshot
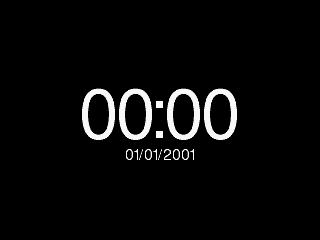
Reference snapshot
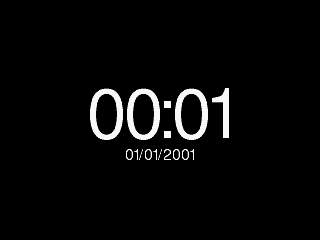
Difference between above images