Espressif officially supports LittlevGL on ESP32! Let's try it!
Espressif has announced that they support LittlevGL on their ESP32 chips. Adding GUI to your ESP32 based IoT device is easier than ever. I made it work in 15 minutes, so it’s really worth a try! I will show an other project too where I achieved 30 FPS with ESP32 on 320 x 240 display.
These are some examples created by the Espressif:
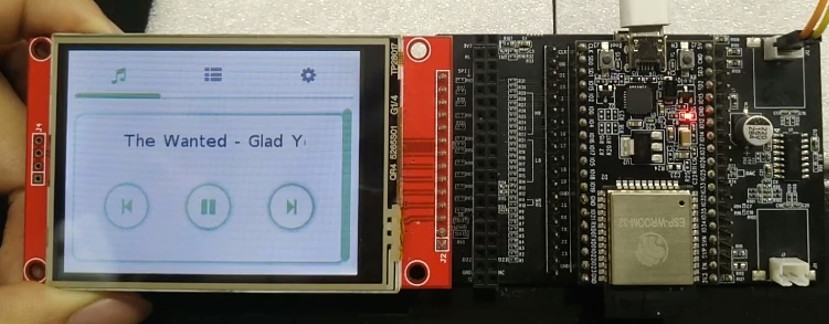 Audio player example on ESP32 with LittlevGL
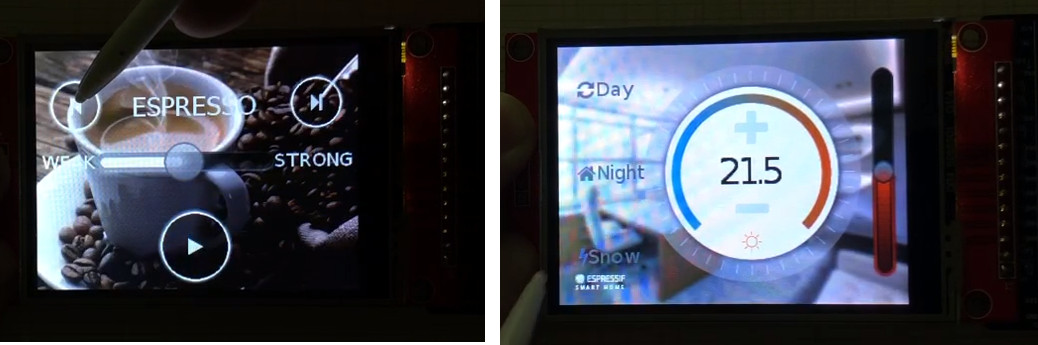 Coffee maker and thermostat example on ESP32 with LittlevGL
Still don’t know ESP32?
ESP32 is powerful SoC (System on Chip) develped by Espressif. The modules built with the chip are extremely popular in IoT applications where connectivity and low-power operation are a must. In addition, ESP32 provides high performance with a dual-core 200 MHz MCU. The modules are usually equipped with external flash (typically 4 MB) which can be mapped as program memory.
Regarding the connectivity, the modules come with fully certified Wi-Fi, BT, and BLE interfaces.
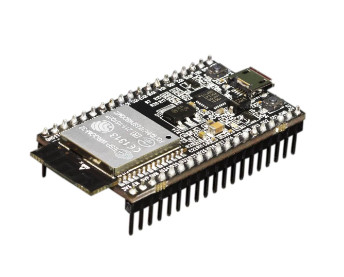
One of the most popular modules is ESP32 WROOM for only $4.
To get started you should buy a development board with an ESP32 module. For example ESP32-DevkitC
 .
.
You don’t need any extra hardware like a programmer because the ESP32 can be programmed via a Serial Port using a simple Micro USB cable.
GUI with ESP32
Although the ESP32 chip doesn’t have an RGB LCD interface or a parallel port to drive a display it has fast SPI ports.
ILI9341, ST7789 SSD1306 are three display controllers which actually have SPI interface and you will find a lot of displays modules equipped with them.
What graphical performance can you expect from ESP32?
There are two main things which determine the graphical performance:
- Rendering time the time to draw a frame (or a part of it).
- Flushing time the time to transfer the rendered image to the display.
The rendering time depends on the speed of the MCU. A GPU can speed it up but unfortunately, ESP32 doesn’t have any. Anyway, a 200 MHz core speed should be fine the render nice GUIs fast enough!
The flushing time depends on the system’s architecture and the peripheries of the MCU. In the case of ESP32, you need to use SPI to send the rendered frame to the display controller.
Some calculations
By default the maximum SPI clock speed of ESP32 is 40 MHz. What does it mean? On a 320x240 disply with 16 bit color depth you need to transfer 320 x 240 x 16 = 1,228,000 bits. On 40 MHz it means 1,228,000 / 40,000,000 = 30 ms.
So to transfer a full frame 30 ms is required.
If you have e.g. 40 ms rendering time the whole process takes 70 ms which means only 14 FPS.
How to speed ESP32 for GUI applications?
There are two options:
- Speed up SPI
- Make the flushing and rendering parallel
Let’s discuss the SPI speed first. This table is from ILI9341’s datasheet (page 230):
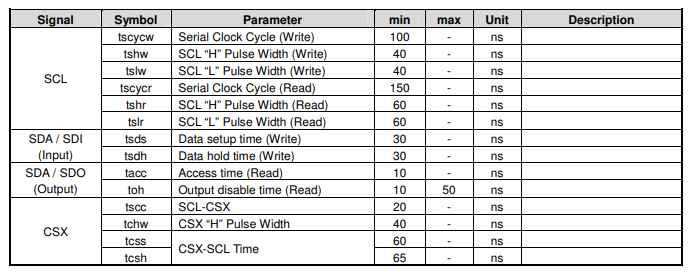 ILI9341 SPI timing
The first line says the one clock period can be minimum 100 ns which means only 10 MHz. It would be extremely slow.
It turned out that ILI9341 actually works at higher clock rates too. They say 48MHz is even possible but it’s still not a big gain compared to the 40 MHz in the previous calculation.
Anyway, in ESP32 you can increase the SPI speed to 80 MHz if you use dedicated pins.
According to the ESP32 SPI documentation:
When the GPIO matrix is used, signals faster than 40MHz cannot propagate and the setup time of MISO is more easily violated, since the input delay of MISO signal is increased. The maximum clock frequency with GPIO Matrix is 40MHz or less, whereas using all IOMUX pins allows 80MHz.
So just choose the following SPI pins to have an 80 MHz clock speed:
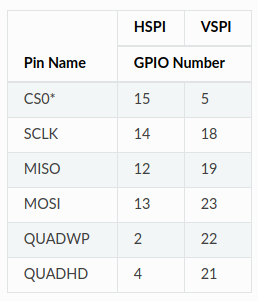 ESP32 SPI: 80 MHz pin configuration
To drive a display only MOSI and SCLK is required from the table.
So let’s use the faster pins. The maximum clock rate is still 40 MHz because of ILI9341 but hopefully, it will give better signals.
To make the rendering and flushing parallel you should use SPI with DMA. The DMA makes possible to send the rendered image via SPI in the background and let the CPU to do other things.
ESP32 supports using DMA with SPI so it’s just the question of the driver and some LittlevGL configuration. (Enable LV_VDB_DOUBLE in lv_conf.h)
Build and flush and official example
Install ESP32 toolchain
To get started you need to install ESP32 development toolchain. Refer to this Guide and follow the steps.
Get ESP IoT Solution
ESP IoT Solution is a huge collection of
- drivers
- libraries
- and examples
Clone it somewhere (preferably in the esp folder where the toolchain was installed):
cd ~/esp/git clone https://github.com/espressif/esp-iot-solution --recurse-submodulesexport IOT_SOLUTION_PATH=~/esp/esp-iot-solution
Configure an example
Choose an example and configure it:
cd esp-iot-solution/examples/hmi/lvgl_examplemake defconfigmake menuconfig
In the menuconfig go to IoT Solution Settings > IoT Component Management > HMI Components > LVGL Settings
In Config Driver
- Choose your screen driver. In my case it was ILI9341
- Set the Screen pins as shown in the image below
- Set the LCD SPI clock to 40,000,000. It was the maximum value so the previously calculated 80 MHz can’t be tried here.
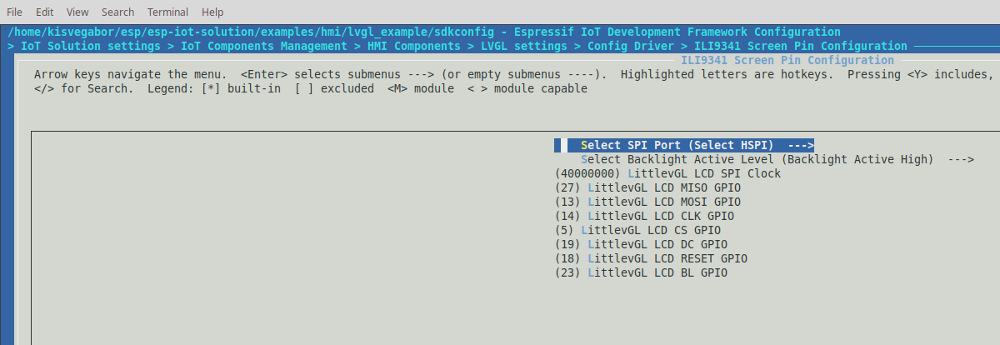 Configuration of ESP to run a LittlevGL example
If you enter into Touch Screen pin configuration you will see only CS and IRQ pin settings. Which means that it uses the same SPI as the Screen driver and the MOSI, MISO and CLK pins are shared. However, my screen has dedicated SPI pins for the touchpad and the screen and I didn’t have “Y” cables. So I disabled touchpad for now in “LittlevGL Touchscreen Enable”.
In the main menu of menuconfig in Serial flasher config be sure the correct Serial port is selected. (ESP32 needs to be connected to your PC to see which Serial port is used.)
After that save the settings and exit menuconfig.
Build and flash
To build and flash type into the Terminal:
maketo build the project. Ormake -j8to build on 8 threads.make flashto program the ESP
And the result is:
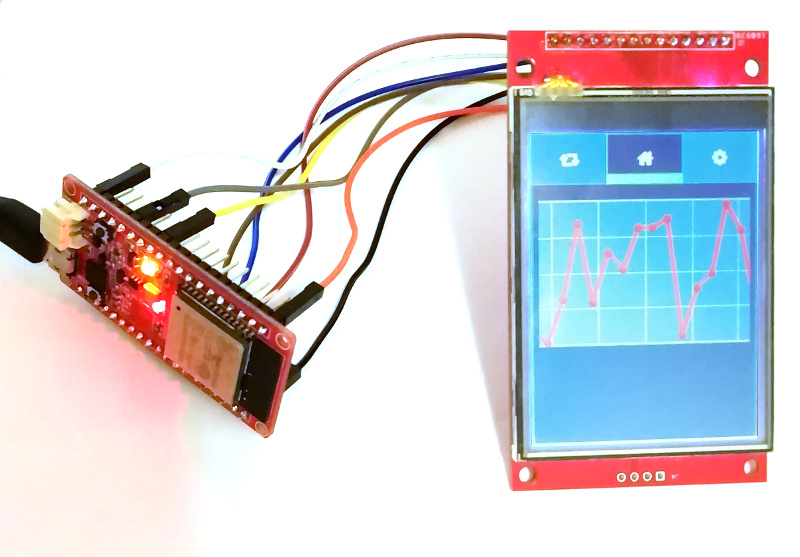 Running an official LittlevGL example on ESP32
LittlevGL with ESP-IDF directly
If you want a more simple project with more freedom you should use ESP-IDF which is the core ESP SDK.
There is a LittlevGL project you can use with ESP-IDF: https://github.com/littlevgl/esp32_ili9431
This project comes with an ILI9341 display driver and an XPT2046 touchpad driver. The display driver uses DMA and makes rendering and flushing parallel which result in a decent frame rate. You can customize these drivers according to your needs.
- Get this projects:
git clone https://github.com/littlevgl/esp32_ili9431.git --recurse-submodules - Add LittlevGL to the build. Copy
lvgl_component.mkandlv_example_component.mkascomponent.mkto thelvglandlv_examplesdirectories respectively. - Connect the touch pad (optional):
- MOSI : 32
- MISO : 25
- SCLK : 26
- CS : 33
- IRQ : 25
makemake flash
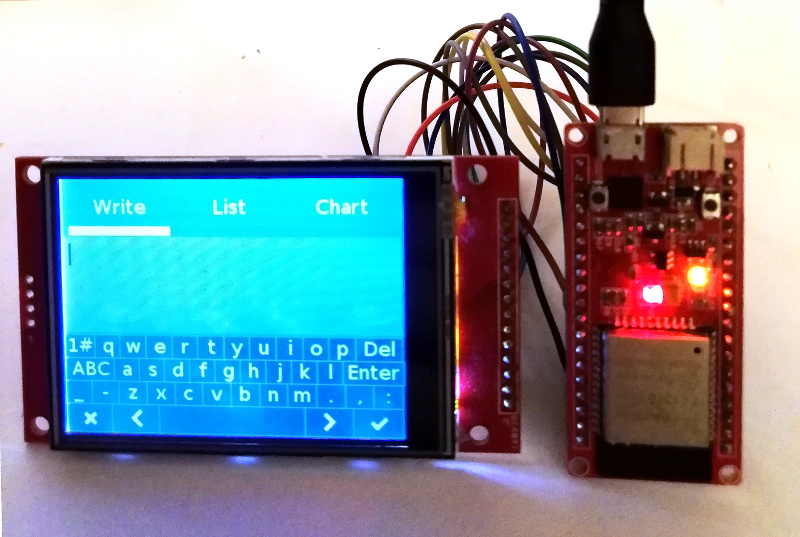 ESP32 is running a LittlevGL example
What FPS can be achieved?
With the GUI on the above image - by making rendering and flushing parallel - I achieved about 30 FPS!
Summary
ESP-IoT-Solution is a great an easy-to-use framework. As you can see it takes only a few minutes to get started.
However, you can use ESP-IDF as well to try LittlevGL. This way you will have more control over your project.
If you have a product with ESP32 and LittlevGL you can share it among LittlevGL References.