Wireless-Tag IDO-SMLCD72-V1-2EC - board certification review
IDO-SMLCD72-V1-2EC is powerful board with OpenWRT operating system, 1024x600 7” screen and 1.2 GHz CPU.
IDO-SMLCD72-V1-2EC is a 7-inch smart display motherboard based on SigmaStar SSD201/SSD202 SoC (ARM Cortex A7 processor), with the main frequency up to 1.2GHz with 256KB L2-Cache. It comes with built-in dual MAC, one PHY, and supporting dual 100MB Ethernet interfaces. It integrates H.264/AVC and H.265/HEVC decoders and supports max. resolution FHD(1920x1080)/60 fps decode.
The board also has audio interface, speaker interface, USB2.0 and WIFI. The manufacturer (Writeless-tag) recommends this board for smart building indoor intercom, smart home central control, elevator floor display, IP network broadcasting device or speech recognition equipment.
IDO-SMLCD72-V1-2EC earned the Professinal LVGL board certification which means it’s a top tier board with high performance, quality and robustness.

Buy now
The IDO-SMLCD72-V1-2EC board can be purchased from Alibaba.
Specification
CPU and memory
- CPU Sigmastar SSD202 ARM Cortex A7, 1.2 GHz
- RAM 128MB
- Flash 128MB
- GPU None
- Operating system OpenWrt
Display
- Resolution 1024*600
- Display size 7”
- Color depth 24bit,RGB888
- Technology IPS
- DPI 170 px/inch
- Touch pad Capacitive
Connectivity
- Wifi: Wireless card onboard + Extra ESP32-WROOM-32U for AIot
- Bluetooth: Extra ESP32-WROOM-32U for AIot
- 4 GPIO available
- 100Mbps Ethernet
- 4pin speaker port
- Analog microphone
- Digital microphone
- TF card
- USB 2.0
- 4 UART port (uart0 for debug and uart3 for the esp32)
- 4G cat1 module
- RTC onboard
- 1080P video decode or stream media can be played via LVGL
Others
- Power supply USB-C (5V)
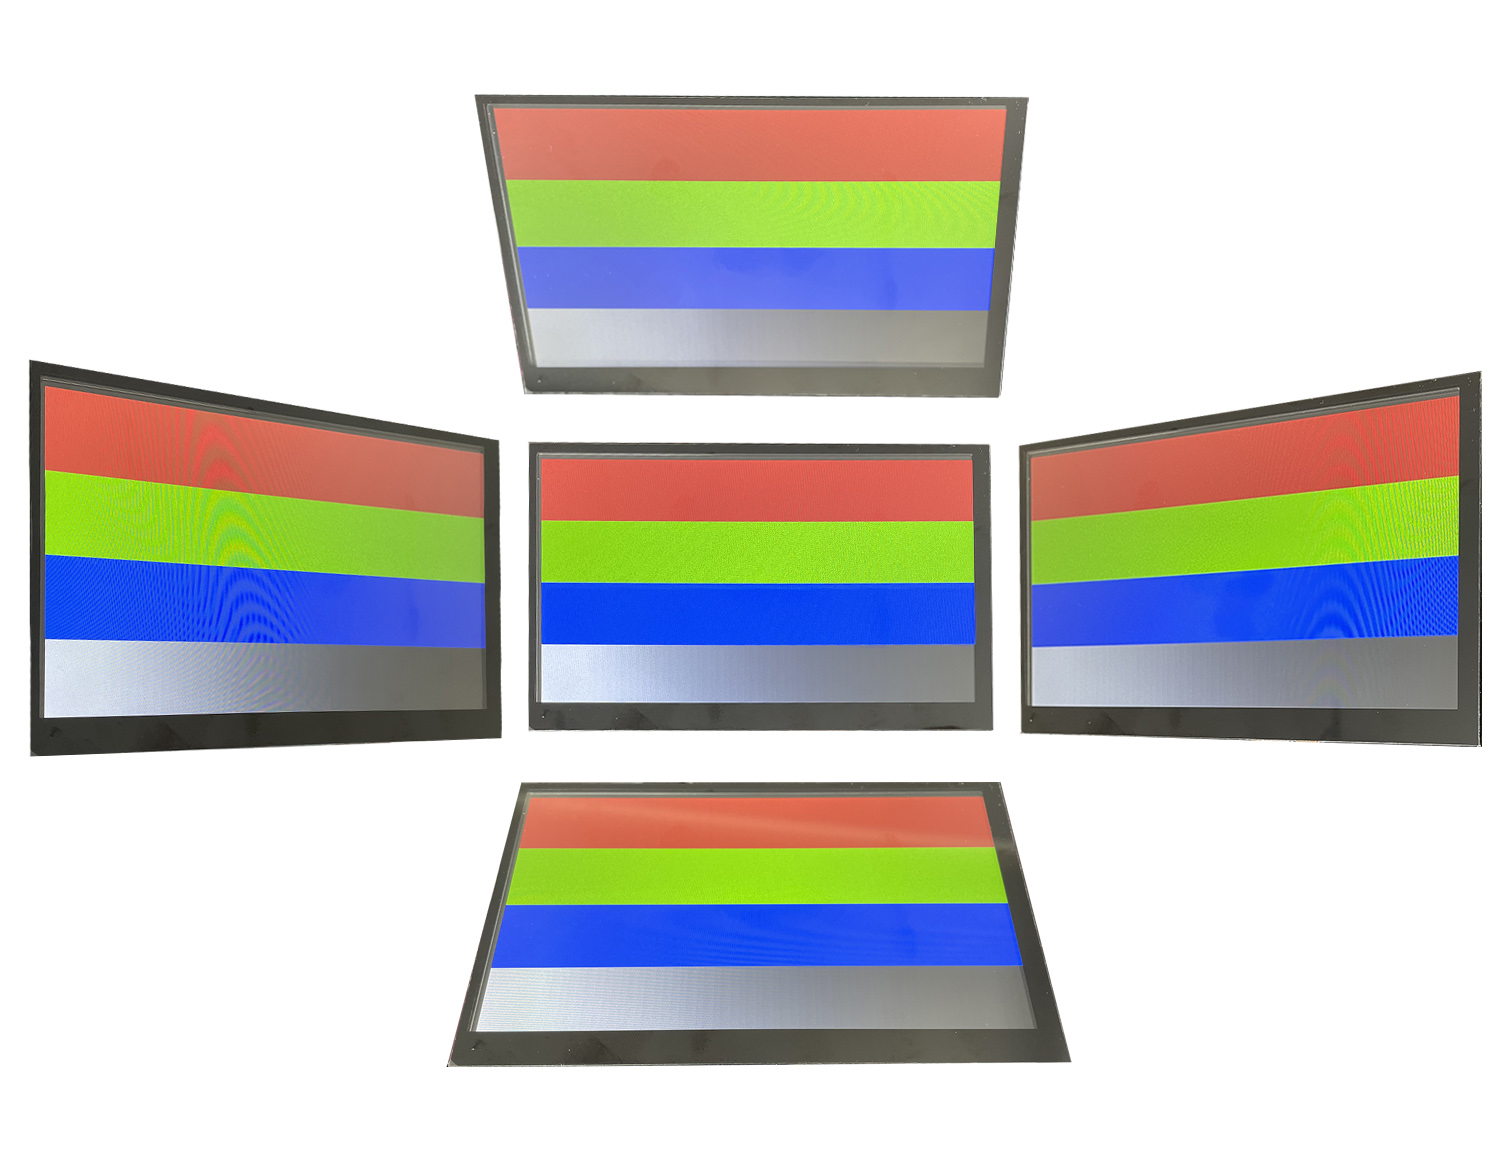
Performance
IDO-SMLCD72-V1-2EC is a powerful computer with OpenWrt (Linux). Even without any GPU, using only the pure 1.2 GHz clock of the CPU the FPS has never dropped below 60 during the benchmark.
The driver uses the the standard dev/fb to simply copy the LVGL rendered image to the framebuffer.
The booting time is very good. The demo started in 8 seconds from power up.
Quality
Display
This board has a large beautiful display with great pixel density.
Touchpad
IDO-SMLCD72-V1-2EC comes with a capactive touchpad. Therefore it recognizes touches with a good precision and provides a smartphone like experience. The drawback is that the touchpad can not be used in gloves or with a pen.
Robustness
IDO-SMLCD72-V1-2EC is designed to be placed into an end product. It’s massive and has many holes to mount the board.
Development
On the products of Wireless-Tag you can develop 2 different ways:
Build and deploy
A getting started project can be found on GitHub. The development instruction in the README are in Chinese so we summarize them here. (Mainly the translation of the README)
Installation dependencies
(Verified on Ubuntu 16.04.7 64-bit)
sudo apt-get install subversion build-essential libncurses5-dev zlib1g-dev gawk git ccache \
		gettext libssl-dev xsltproc libxml-parser-perl \
		gengetopt default-jre-headless ocaml-nox sharutils textinfo
sudo dpkg --add-architecture i386
sudo apt-get update
sudo apt-get install zlib1g:i386 libstdc++6:i386 libc6:i386 libc6-dev-i386
Install toolchian
Download the toolchain from here.
- Unzip the toolchain
sudo tar wt-gcc-arm-8.2-2018.08-x86_64-arm-linux-gnueabihf.tag.gz -xvf -C /opt/ - Set environment variables: modify
~/.profilefile, add the following line to the end of the file
PATH="/opt/gcc-arm-8.2-2018.08-x86_64-arm-linux-gnueabihf/bin:$PATH"
- Update the environment variables
source ~/.profile - Test cross toolchain
arm-linux-gnueabihf-gcc --version
Get and build the project
git clone https://github.com/wireless-tag-com/8ms-sstar.git
cd 8ms-sstar
make -j
Deploy
You can use either the serial port or the Ethernet port to connect to the board.
We have used the Ethernet port via telnet:
telnet 192.168.1.1
The password is admin.
After you can use all the normal Linux commands. To copy the built project to the board we have used scp. On the development PC use the following command to copy the created binary to the boards root folder.
scp ./bin/demo root@192.168.1.1:/
Going back to the telnet session and issuing ./demo will start the demo.
If you place the demo to usr/sbin the demo will start automatically on start up.
Editor
Wireless-Tag’s online editor is available at 8ms.xyz. It’s drag and drop editor allowing you to create UIs without writinga single line of code. Besides easily putting together a UI you can use Blockly to implement the business logic.
After signing up and logging in click the red “Workbench” button on to right corner.

After click the “New” button on the right, Select “Sigmaster” and “SSD201+SPI NAND + CC0702I50R(1024*600)” hardware.
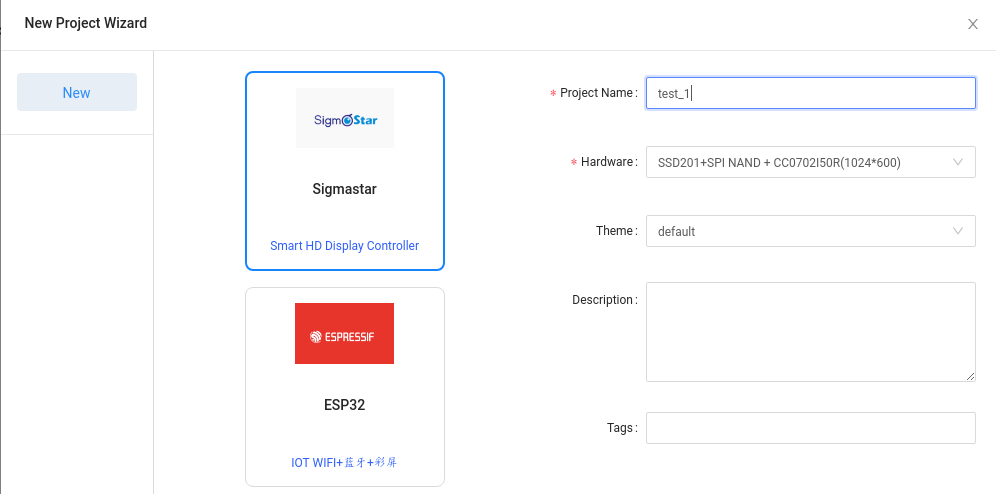
Click confirm and you are raedy play with the UI.
In the “Layout” menu you can select “Blockly” to add some logic too.
From the “Compile” menu you can download the binary, the source code or start an online preview.
Conclusion
IDO-SMLCD72-V1-2EC is an amazing board. Using OpenWRT (Linux) the development, development and maintenance are very simple. Besides the the performance and the robustness of the board are also great.
Due to 8ms editor you don’t need to be a professional developer to get started with this product.