Extend the functionality of objects in LittlevGL
Although the Objects in LittlevGL have a lot of built-in features sometimes you might need something special. For example, draw something unique on an object or change its behavior. In this post, I will show you how to add extra functionality to the objects in LittlevGL. You will also learn how LittlevGL works under to hood
Inheritance
Maybe you already know about the inheritance among object types in LittlevGL. Don’t panic if don’t you can learn it now.
Although C doesn’t support classes and inheritance as C++ does with a few tricks and limitations something similar can be achieved. In LittlevGL inheritance means that a derived object knows all the features of its ancestor.
For example, a Button is inherited from the Container. The Container has the Layout feature so the Button also has this feature. The Container is inherited from the Base object. The Base object knows all the basic things like position and size. So the Container and the Button also have position and size attributes.
 Inheritance example in LittlevGL
Because the Base object is the ancestor of every object type (sometimes indirectly through other objects types) every object type has size, position, and similar basic attributes.
Extended data
In LittlevGL every object type has a data structure (struct) which holds data for the objects. It is called extended data.
For example, in case, of a Button this structure stores the current state (pressed, released etc.) and the styles for each state.
To work with inheritance the ancestors should see the object in same way independently if something is derived from it or not. So Container shouldn’t care about if it’s really just a Container or a Button, the layout feature should work. To achieve it the extended data is declared like this:
/*Example extended data of an ancestor */
typedef struct {
  int value1;
  int value2;
} ancestor_t;


/*Example extended data of a derived object*/
typedef struct {
  ancestor_t ancestor;      /*Include the ancestors extend data first*/
  char * text;              /*Add new data*/
} derived_t;
So the key is to add the ancestors extended data first. This way if the ancestor reads the extended data as ancestor_t is will see the correct type and if the derived reads it, it will see the ancesor + derived data.
Add custom extended data to an object type
Let’s see a silly but real life example. Store an integer temperature value in a button’s extended data:
/*Custom extended data based on the Button*/
typedef struct {
    lv_btn_ext_t btn;       /*The ancestor button structure*/
    int temp;               /*New custom data*/
}temp_btn_ext_t;

/**
 * Called when the button is clicked
 * @param btn pointer to a button
 * @return LV_RES_OK because the button is not deleted here
 */
lv_res_t btn_click(lv_obj_t * btn)
{
    /*Get the extended data*/
    temp_btn_ext_t * ext = lv_obj_get_ext_attr(btn);

    /*Do something with the temperature value*/
    printf("Button temp: %d\n", ext->temp);

    return LV_RES_OK;
}

void test(void)
{
    lv_obj_t * btn = lv_btn_create(lv_scr_act(), NULL);
    lv_btn_set_action(btn, LV_BTN_ACTION_CLICK, btn_click); /*Assign an action function*/
    lv_obj_allocate_ext_attr(btn, sizeof(temp_btn_ext_t));  /*Re-alloacte the extended data*/

    /*Use the custom extended data*/
    temp_btn_ext_t * ext = lv_obj_get_ext_attr(btn);
    ext->temp = 42;
}
That’s it. Now you know how to add any custom data an object.
Custom functions
In LittlevGL every object has two special functions:
- Design function defines how the object should look like
- Signal function defines how the object should behave
Design function
The design function of the objects are called automatically by the library when the object needs to be redrawn. A simple design function to draw a rectangle looks like this:
/**
 * Example design function
 * @param obj pointer to the object to draw
 * @param mask only this area will be redrawn
 * @param mode see below
 * @return if mode == LV_DESIGN_COVER_CHK:
 *              true if the object fully covers the mask area
 *         else:
 *              always true
 */
bool example_design(lv_obj_t * obj,
                    const  lv_area_t * mask,
                    lv_design_mode_t mode)
{
    if(mode == LV_DESIGN_COVER_CHK) {
        /* Decide if the object's coordinates (obj->coords)
         * are fully cover mask or not */
        if(cover) return true;
        else return false;
    }
    else if(mode == LV_DESIGN_DRAW_MAIN) {
        /* Draw the object. For example draw a rectangle. */
        lv_style_t * style = lv_obj_get_style(obj);
        lv_draw_rect(&obj->coords, mask_p, style, lv_obj_get_opa_scale(obj));
    }
    else if(mode == LV_DESIGN_DRAW_POST) {
        /* You can do here further drawings when all the
         * children of this object are drawn.
         * For example, scroll bars of lv_page are drawn here to be on top*/
    }

    return true;
}
It might look a little bit complicated. But usually you don’t have to write a totally new design function, just extend the existing one.
Let’s continue the previous “button + temperature” example and display the stored temperature data on the button using a custom design function. For simplicity the text is not aligned vertically.
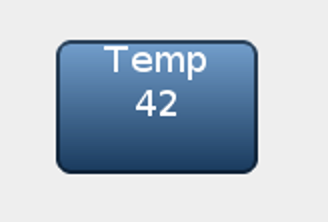 Extended design function adds custom text to a LittlevGL button
/*Store the original button design function here*/
static lv_design_func_t old_btn_design;

bool new_btn_design(lv_obj_t * obj, const  lv_area_t * mask, lv_design_mode_t mode)
{
    if(mode == LV_DESIGN_COVER_CHK) {
       /*Use the original function for cover check*/
       return old_btn_design(obj, mask, mode);

    } else if(mode == LV_DESIGN_DRAW_MAIN) {
        /*Draw the original button first*/
        old_btn_design(obj, mask, mode);

        /*Draw a label*/
        temp_btn_ext_t * ext = lv_obj_get_ext_attr(obj);
        char buf[32];
        sprintf(buf, "Temp\n%d", ext->temp);
        lv_draw_label(&obj->coords, mask, &lv_style_btn_rel, lv_obj_get_opa_scale(obj), buf, LV_TXT_FLAG_CENTER, NULL);

    } else if(mode == LV_DESIGN_DRAW_POST) {
        /*Use the original function for post draw*/
        old_btn_design(obj, mask, mode);
    }

    return true;
}

void test_btn(void)
{
    lv_obj_t * btn = lv_btn_create(lv_scr_act(), NULL);
    old_btn_design = lv_obj_get_design_func(btn);
    lv_obj_set_design_func(btn, new_btn_design);
}
Animation example
Now create a custom animation using some additional extended data and a new design function. The animation will change the button’s appearance to the pressed style and back when it is released.
 Animated button with LittlevGL
/*Store the original button design function here*/
static lv_design_func_t old_btn_design;

/**
 * Called by the animation
 * @param btn pointer to a button to animate
 * @param value current value of animation
 */
static void btn_anim_func(void * btn, int32_t value)
{
    /* Save the new value and refresh the object.
     * `anim_state` will be used in the design function*/
    temp_btn_ext_t * ext = lv_obj_get_ext_attr(btn);
    ext->anim_state = value;
    lv_obj_invalidate(btn);
}

/**
 * Called when the button is clicked
 * @param btn pointer to a button
 * @return LV_RES_OK because the button is not deleted here
 */
lv_res_t btn_click(lv_obj_t * btn)
{
    /*Start a play back animation */
    lv_anim_t a;
    a.var = btn;
    a.start = 0;
    a.end = 255;
    a.fp = (lv_anim_fp_t)btn_anim_func;
    a.path = lv_anim_path_linear;
    a.end_cb = NULL;
    a.act_time = 0;
    a.time = 200;
    a.playback = 1;
    a.playback_pause = 100;
    a.repeat = 0;
    a.repeat_pause = 0;
    lv_anim_create(&a);

    return LV_RES_OK;
}

bool new_btn_design(lv_obj_t * obj, const  lv_area_t * mask, lv_design_mode_t mode)
{
    if(mode == LV_DESIGN_COVER_CHK) {
       /*Use the original function for cover check*/
       return old_btn_design(obj, mask, mode);

    } else if(mode == LV_DESIGN_DRAW_MAIN) {

        /*Draw a rectangle with the normal released style*/
        lv_draw_rect(&obj->coords, mask,
                     lv_btn_get_style(obj, LV_BTN_STYLE_REL), lv_obj_get_opa_scale(obj));

        /* Draw an other rectangle on top of the previous with pressed state but
         * set its opacity according to `anim_state`*/
        temp_btn_ext_t * ext = lv_obj_get_ext_attr(obj);
        lv_style_t style;
        lv_style_copy(&style, lv_btn_get_style(obj, LV_BTN_STYLE_PR));
        style.body.opa = ext->anim_state;
        lv_draw_rect(&obj->coords, mask, &style, lv_obj_get_opa_scale(obj));

    } else if(mode == LV_DESIGN_DRAW_POST) {
        /*Use the original function for post draw*/
        old_btn_design(obj, mask, mode);
    }

    return true;
}

void test_btn(void)
{
    lv_obj_t * btn = lv_btn_create(lv_scr_act(), NULL);
    lv_btn_set_action(btn, LV_BTN_ACTION_CLICK, btn_click);
    lv_obj_allocate_ext_attr(btn, sizeof(temp_btn_ext_t));  /*Re-alloacte the extended data*/

    /*Initialize the custom extended data*/
    temp_btn_ext_t * ext = lv_obj_get_ext_attr(btn);
    ext->anim_state = 0;

    /*Save the old design function and set the new one */
    old_btn_design = lv_obj_get_design_func(btn);
    lv_obj_set_design_func(btn, new_btn_design);
}
Signal function
The signal function is responsible for the behavior of the objects. When something happens with an object the library automatically sends a signal to the object to notify it. The signal is processed in the signal function and the object can do something according to the event.
For example, when an object is released LV_SIGNAL_RELEASED is sent. In this case, a button calls the user-defined release action.
An other signal is LV_SIGNAL_CORD_CHG. For example, the Page object uses it to limit the scrolling of the scrollable area.
 The scrolling on a Page is limited
A signal function always calls its ancestor’s signal function first. This way an object type can inherit the behavior of its ancestors. For example, if a Button’s size has changed the layout needs to be recalculated by the Container (ancestor).
So let’s see what happens:
- You call
lv_obj_set_size(btn, width, height) lv_obj_set_sizesends aLV_SIGNAL_CORD_CHGto the Button- In the Button’s signal function its ancestor’s (Container) signal function is called
- In the Container’s signal function the layout is recalculated i. e. the children are repositioned according to the new size.
- Finally, the button processes the signal, however. it has nothing to do with
LV_SIGNAL_CORD_CHG.
So by inheriting the Button from the Container, all the Container functionalities can be used by the Button.
Position limitation with a custom signal function
I will show you an example, how to create a signal function which:
- Doesn’t let a button to be dragged out of its parent
- Enables only horizontal dragging
- Animates the button to the middle on release
Without the new signal function it behaves like:
 Position limit still not applied
But with the new signal function:
 Limit the position with signal function and add animation
static lv_signal_func_t old_btn_signal;     /*Store the old signal function*/
static lv_obj_t * info_label;               /*A label for the demo*/

/**
 * The new Signal function
 * @param btn pointer to the button object
 * @param sign a signal type from `lv_signal_t` enum
 * @param param pointer to a signal specific variable
 * @return LV_RES_OK: the object is not deleted in the function; LV_RES_INV: the object is deleted
 */
static lv_res_t new_btn_signal(lv_obj_t * btn, lv_signal_t sign, void * param)
{
    lv_res_t res;

    /* MANDAORY: Include the ancient signal function */
    res = old_btn_signal(btn, sign, param);
    if(res != LV_RES_OK) return res;

    /*Limit the horizontal movement if the coordinates are changed*/
    if(sign == LV_SIGNAL_CORD_CHG) {

        lv_coord_t x = lv_obj_get_x(btn);
        lv_coord_t w = lv_obj_get_width(btn);
        lv_obj_t * parent = lv_obj_get_parent(btn);
        lv_coord_t parent_w = lv_obj_get_width(parent);

        if(x < 0) x = 0;
        else if(x + w > parent_w) x = parent_w - w;

        /*Align vertically to the middle and use the limited x coordinate*/
        lv_obj_align(btn, parent, LV_ALIGN_IN_LEFT_MID, x, 0);
    }
    /*If the knob is released ... */
    else if(sign == LV_SIGNAL_RELEASED || sign == LV_SIGNAL_PRESS_LOST) {
        lv_coord_t x = lv_obj_get_x(btn);
        lv_coord_t w = lv_obj_get_width(btn);
        lv_obj_t * parent = lv_obj_get_parent(btn);
        lv_coord_t parent_w = lv_obj_get_width(parent);

        /* The Click action is not called if the button was dragged.
         * So call it manually*/
        lv_action_t click_action = lv_btn_get_action(btn, LV_BTN_ACTION_CLICK);
        if(click_action) click_action(btn);

        /*Animate the knob back to the middle*/
        lv_anim_t a;
        a.var = btn;
        a.start = x;
        a.end = parent_w / 2 - w / 2;
        a.fp = (lv_anim_fp_t)lv_obj_set_x;
        a.path = lv_anim_path_linear;
        a.end_cb = NULL;
        a.act_time = 0;
        a.time = 200;
        a.playback = 0;
        a.playback_pause = 0;
        a.repeat = 0;
        a.repeat_pause = 0;
        lv_anim_create(&a);
    }

    return res;
}

/* Called when the btn is released */
static lv_res_t btn_click(lv_obj_t* btn)
{
    lv_coord_t x = lv_obj_get_x(btn);
    lv_obj_t * parent = lv_obj_get_parent(btn);
    lv_coord_t parent_w = lv_obj_get_width(parent);

    /*Determine the side and update the info label*/
    if(x < parent_w / 2) lv_label_set_text(info_label, "Left");
    else lv_label_set_text(info_label, "Right");

    lv_obj_align(info_label, parent, LV_ALIGN_OUT_BOTTOM_MID, 0, 10);

    return LV_RES_OK;
}

void test_knob(void)
{
    /*Create a parent (gray rectangle)*/
    lv_obj_t * parent = lv_obj_create(lv_scr_act(), NULL);
    lv_obj_set_size(parent, 200, 50);
    lv_obj_set_style(parent, &lv_style_pretty);

    /*Create a square rectangle button*/
    lv_obj_t * btn = lv_btn_create(parent, NULL);
    old_btn_signal = lv_obj_get_signal_func(btn);       /*Save to old signal function*/
    lv_obj_set_signal_func(btn, new_btn_signal);        /*Set a new signal function*/
    lv_btn_set_action(btn, LV_BTN_ACTION_CLICK, btn_click); /*Set an action*/
    lv_obj_set_drag(btn, true);                         /*Enable dragging*/
    lv_obj_set_size(btn, 40, 40);                       /*Set the size*/
    lv_obj_align(btn, parent, LV_ALIGN_CENTER, 0, 0);   /*Align to the center of the parent*/
    lv_obj_set_protect(btn, LV_PROTECT_PRESS_LOST);     /*To prevent press lost on fast drags*/

    /*Create an info label for the demo*/
    info_label = lv_label_create(lv_scr_act(), NULL);
    lv_label_set_text(info_label, "Drag the knob");
    lv_obj_align(info_label, parent, LV_ALIGN_OUT_BOTTOM_MID, 0, 10);

}
Summary
You have just learnt the three most important internal mechanisms of LittlevGL:
- Extended data
- Design function
- Signal Function
Use them them customise the exiting objects according to your needs!