Embedded GUI Using Linux Frame Buffer Device with LVGL
LVGL is a graphics library targeting microcontrollers with limited resources. However it possible to use it to create embedded GUIs with high-end microprocessors and boards running Linux operation system. The most well know processors cores are the ARM Cortex A9 (e.g. NXP i.MX6) and ARM Cortex A53 (e.g. Raspbery PI 3). You can create an embedded GUI on this single board computers by simply using Linux’s frame buffer device (typically /dev/fb0). If you don’t know LVGL yet learn more about it here: LVGL
Why use the frame buffer directly?
The frame buffer device is a very low-level interface to display something on the screen. Speaking about an embedded GUI there are several reasons to use the frame buffer directly instead of a Window manager:
- simple Just write the pixels to a memory
- fast No window manager which means fast boot and less overhead
- portable Independently from the distribution every Linux system has a frame buffer device so it’s compatible with all of them
Get started with the Linux frame buffer
Maybe you are familiar with the Linux frame buffer device. It is a file usually located at /dev/fb0. This file contains the pixel data of your display. If you write something into the frame buffer file then the changes will be shown on the display. If you are using Linux on your PC you can try it using a terminal:
- Press Ctrl + Alt + F1 to leave the desktop and change to simple character terminal
- Type
sudo suand type your password - Stop your Display manager (on Ubuntu it’s lightdm):
service lightdm stopImportant: it will log you out, so all windows will be closed - Write random data to the frame buffer device:
cat /dev/urandom > /dev/fb0You should see random colored pixels on the whole screen. - To go back to the normal Graphical User Interface:
service lightdm start

It should work on Linux based single board computer too like:
Get LVGL to create embedded GUI
Now you know how to change the pixels on your displays. But you still need something which creates GUI elements instead of random pixels. Here comes LVGL into the picture. This software library is designed to create GUI elements (like labels, buttons, charts, sliders, checkboxes etc.) on an embedded system’s display. Check all the widgets here. The graphics library is written in C so you can surely adapt it in your project. The make your GUI impressive opacity, smooth animations, anti-aliasing and shadows can be added.
To use LVGL you need to clone it from GitHub or get from the Developers page. The following components will be required:
- lvgl The core of the graphics library
- lv_drivers Contains a Linux frame buffer driver
- lv_examples Optionally to load a demo application to test
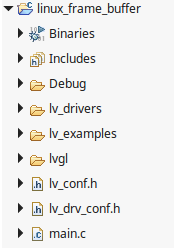
GUI project set-up
The most simple case to test the frame buffer device based GUI on your Linux PC. Later you apply the same code on an embedded device too.
- Create a new project in your preferred IDE
- Copy the template configuration files next to lvgl and lv_drivers folders:
- lvgl/lv_conf_templ.h as lv_conf.h
- lv_drivers/lv_drv_conf_templ.h as lv_drv_conf.h
- In the config files remove the first and last #if and #endif to enable their content.
- In lv_drv_conf.h set USE_FBDEV 1
- In lv_conf.h change the color depth: LV_COLOR_DEPTH 32
- Add the projects root folder as include path
Create an embedded GUI application
- In main.c write the following code to create a hello world label:
#include "lvgl/lvgl.h"
#include "lv_drivers/display/fbdev.h"
#include <unistd.h>

int main(void)
{
    /*LVGL init*/
    lv_init();

    /*Linux frame buffer device init*/
    fbdev_init();

   /*A small buffer for LittlevGL to draw the screen's content*/
    static lv_color_t buf[DISP_BUF_SIZE];

    /*Initialize a descriptor for the buffer*/
    static lv_disp_draw_buf_t disp_buf;
    lv_disp_draw_buf_init(&disp_buf, buf, NULL, DISP_BUF_SIZE);

    /*Initialize and register a display driver*/
    static lv_disp_drv_t disp_drv;
    lv_disp_drv_init(&disp_drv);
    disp_drv.draw_buf   = &disp_buf;
    disp_drv.flush_cb   = fbdev_flush;
    disp_drv.hor_res    = 800;
    disp_drv.ver_res    = 480;
    lv_disp_drv_register(&disp_drv);

    /*Create a "Hello world!" label*/
    lv_obj_t * label = lv_label_create(lv_scr_act());
    lv_label_set_text(label, "Hello world!");
    lv_obj_align(label, LV_ALIGN_CENTER, 0, 0);

    /*Handle LitlevGL tasks (tickless mode)*/
    while(1) {
        lv_tick_inc(5);
        lv_timer_handler();
        usleep(5000);
    }

    return 0;
}
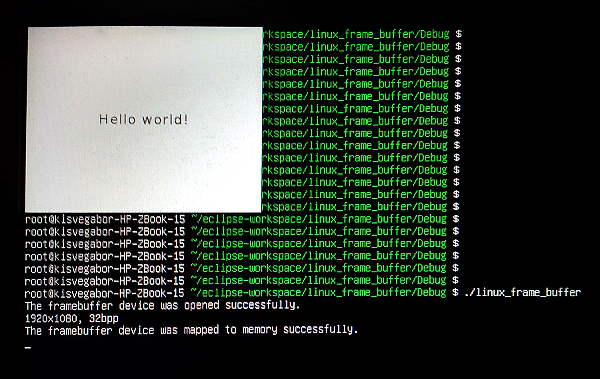
- Compile the code and go back to character terminal mode (Ctrl + Alt + F1 and
service lightdm stop) - Go to the built executable file and type:
./file_name
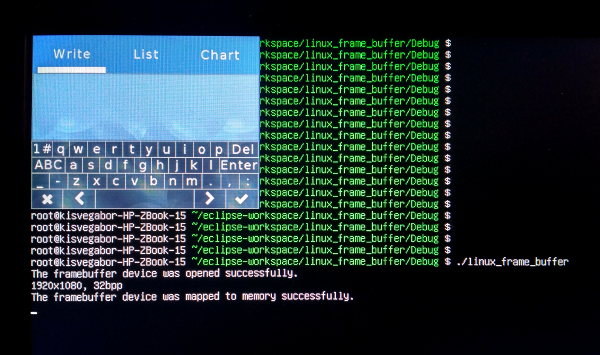
- Test with a demo application by replace the Hello world label create with:
demo_create();
Download a ready-to-use project
In lv_port_linux_frame_buffer repository you find an Eclipse CDT project to try out the plain frame buffer based GUI with a Linux PC.
There is a Makefile too to compile the project on your embedded hardware without an IDE.
Other notes
Hide the cursor
It might happen that you see a blinking cursor on the screen. The way of hiding it is platform dependent but as an example here you can see how to do it on Raspberry:
- Edit
/boot/cmdline.txtfile - Add
vt.global_cursor_default=0
Summary
I hope you liked this tutorial and found it useful for your microprocessor-based embedded Linux projects. As you can see it’s super easy is to create an embedded GUI with LVGL using only a plain Linux frame buffer.
To learn more about the graphics library start to read the Documentation.
If you don’t have a embedded hardware right now you can begin the GUI development on PC.
If you have questions use GitHub issue tracker.